This section illustrates how to create a new simple plugin for MapStore.
All the steps described below are intended to be executed against the MapStore source code.
The source code is located into the folder $TRAINING_ROOT/src and can be accessed through
1 | $TRAINING_ROOT\src\SKShell.bat
|
In order to develop a plugin for MapStore, few easy steps have to be performed
Create a new JavaScript file inside the folder mapstore/mapcomposer/app/static/externals/gxp/src/script/plugins
Include the path of the newly created file into the file mapstore/mapcomposer/buildjs.cfg in order to link the dependency to the build
- Include the plugin in one or both MapStore configuration files at the following paths:
- mapstore/mapcomposer/app/staic/config/mapStoreConfig.js ; If you need the plugin to be available from MapComposer
- mapstore/mapcomposer/app/staic/config/viewerConfig.js ; if you need the plugin available from MapViewer
In the next section we will see a step by step process to add a new plugin to MapStore.
The full code of the example plugin is available at:
1 2 3 4 5 6 7 8 9 10 11 12 13 14 15 16 17 18 19 20 21 22 23 24 25 26 27 28 29 30 31 32 33 34 35 36 37 38 39 40 41 42 43 44 45 46 | /**
* @requires plugins/Tool.js
*/
/** api: (define)
* module = gxp.plugins
* class = HelloMapStore
*/
/** api: (extends)
* plugins/Tool.js
*/
Ext.namespace("gxp.plugins");
/** api: constructor
* .. class:: HelloMapStore(config)
*
* Plugin for adding a new group on layer tree.
*/
gxp.plugins.HelloMapStore = Ext.extend(gxp.plugins.Tool, {
/** api: ptype = gxp_addgroup */
ptype: "gxp_hellomapstore",
/**
* api: method[addActions]
*/
addOutput: function() {
var apptarget = this.target;
var out = gxp.plugins.HelloMapStore.superclass.addOutput.apply(this, [{
text:'hello',
disabled: false,
handler: function() {
Ext.Msg.show({
title : "hello",
msg : "Hello Mapstore!!"
});
},
scope: this
}]);
return out;
}
});
Ext.preg(gxp.plugins.HelloMapStore.prototype.ptype, gxp.plugins.HelloMapStore);
|
Note
The comment @requires plugins/Tool.js allows the testing tools to include the plugins dependencies in the correct order.
Add the plugin to the build procedure configuration files.
The new plugin must be available among the application dependencies. In order to do that, you must include the file path into mapstore/mapcomposer/buildjs.cfg
Note
If it’s a gxp plugin type, after the building phase all the separated files will be compressed into a unique gxp.js file.
To add your own plugin, just write the path of the new JavaScript file into the “include” list of the buildjs.cfg file
Add the plugin to the map.
It is possible to add a plugin to the application in several ways. The easiest one is through a specific entry “customTools” of the main configuration file viewerConfig.js
- The properties to add to the list are explained here below:
- ptype; specifies the type of the component. It is registered inside the component JavaScript file and definition. It must be present as element of the component code.
- outputTarget; represent the reference of the component which will be the container of the new plugin, the panelbar in the example above.
Once the steps above have been completed:
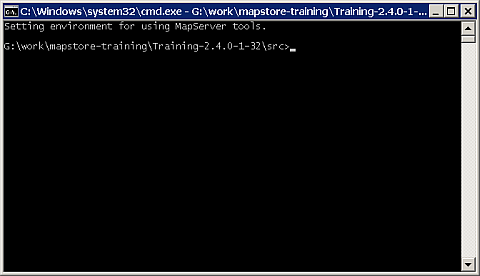
Run the command $TRAINING_ROOT/src/SKShell.bat.
A command shell window should pop-up as depicted in the figure below
Go to the mapstore folder and run the following command
ant
Wait until the build has been successfully completed
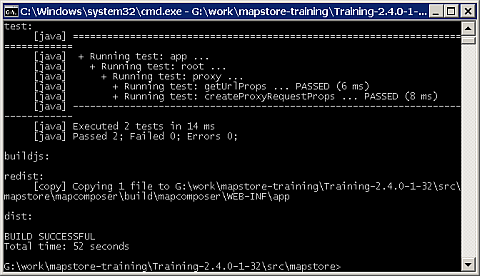
Be sure that:
Go to the mapstore folder and run the following command
Once you see the message below
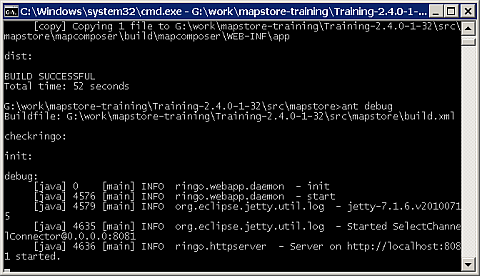
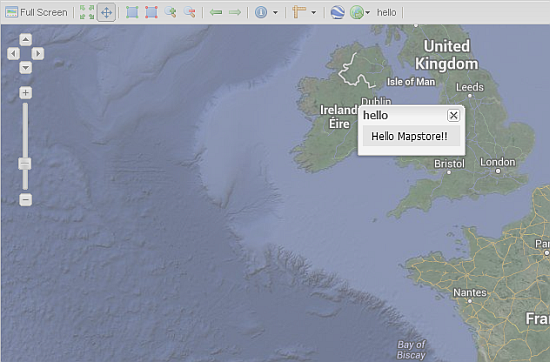
Access to MapStore (http://localhost:8081/?config=viewerConfig)

Note
Notice the hello button into the top ToolBar.
Click on the new hello button to interact with the newly created plugin